More Miniature Aircraft goodness

06-06-2021

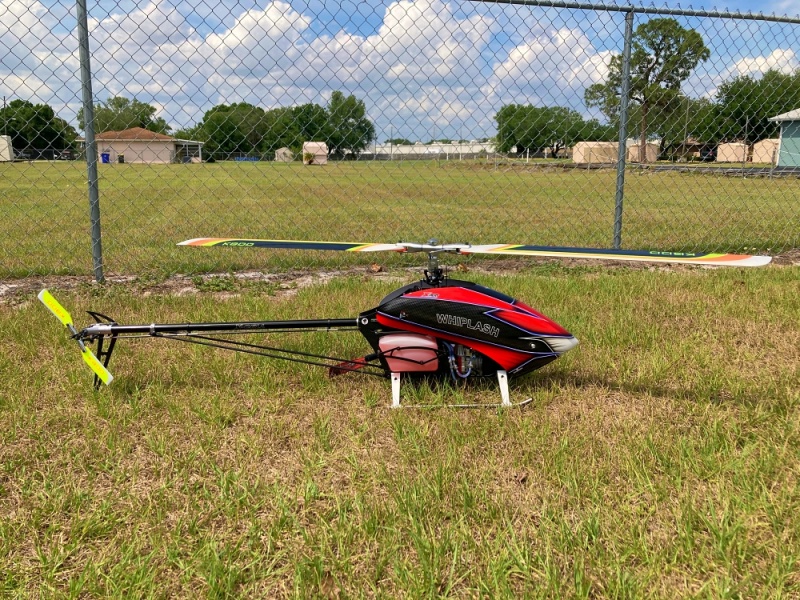
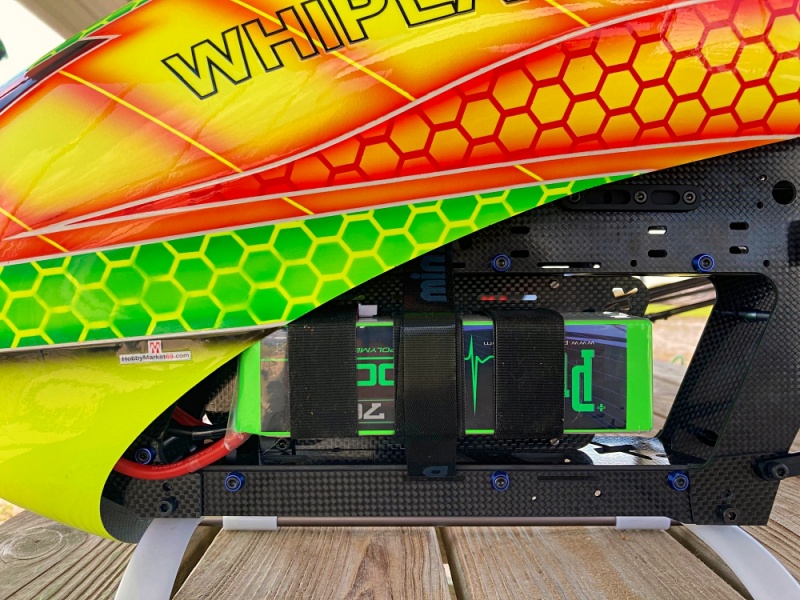
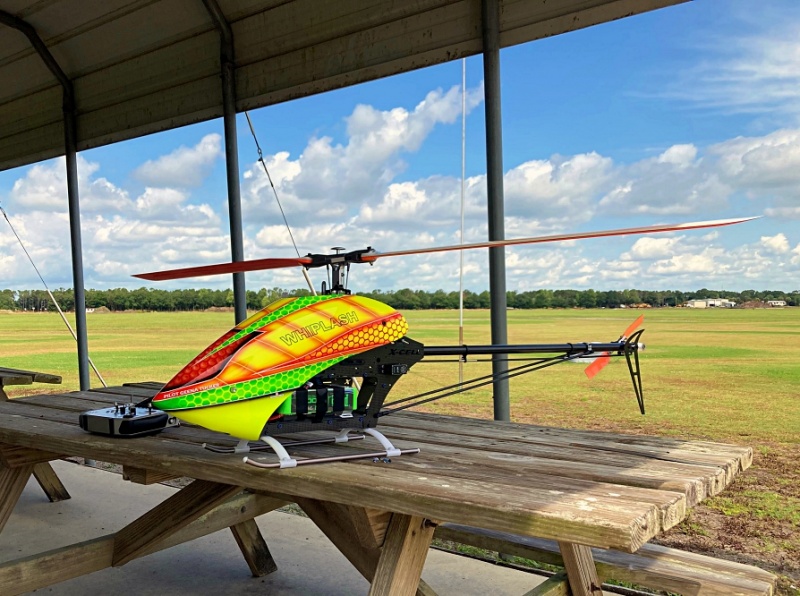
I have been busy for the past few weeks, building two more Miniature Aircraft helicopters to add to my fleet. The first one, is my F3C contest helicopter. A Whiplash 730E.

I got it build and set up a couple of weeks before this blog post, and I have about a dozen flights on it so far. In true Miniature aircraft form, it flies great. It takes saddle packs, which I was never a huge fan of.

I usually prefer stick packs on a slide in tray, but Miniature aircraft did the saddle pack mounting system right....and I have changed my mind about saddle packs now. They are SO easy to put in and take out, and only takes a few seconds to do.


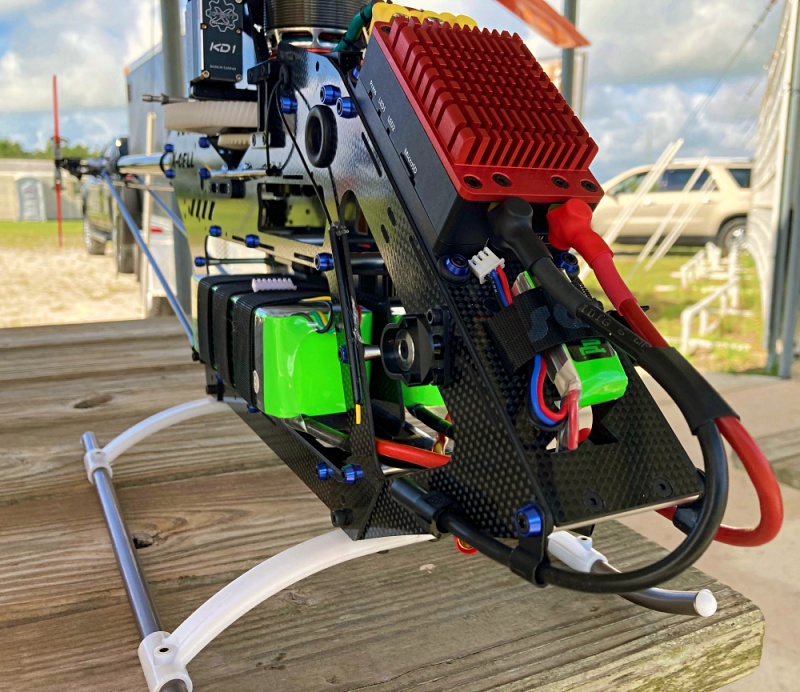
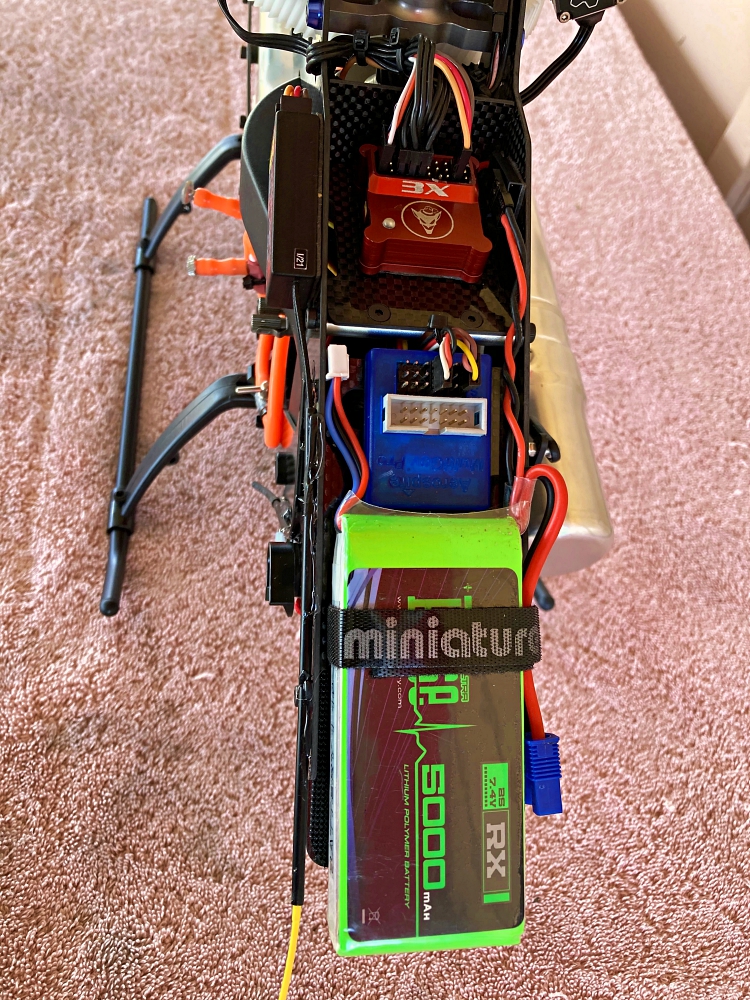
Another feature I love about all of my Miniature aircraft helicopters, is the layout for installing the electronics. They thought of EVERYTHING when it comes to installing the speed control, receiver battery, governor.......and so on.

They must have been thinking of Kontronik when they designed the ESC mount, because there are holes pre-cut into the tray, to accommodate the mounting tabs on the Kontronik ESC, and they even supplied blind nuts to press into the holes to fasten the speed control to the tray. Just Brilliant thinking.

I also couldn`t help but notice how quiet and smooth the drive train is, and there is almost no gear noise at all. The canopy is also large enough to house my Kontronik 170A Hvi speed control, without having to modify, cut or damage the canopy. yet it still has very nice lines, and a streamlined look.


The Whiplash 730 E is a well built, well thought out design, and it flies like a dream. It weighs just over 8 pounds without the batteries and just over 12 pounds with the batteries in it. But it does not feel like a 12 pound helicopter in the air. It`s quite snappy in 3D flight, but settles in good for doing F3C flying. Kind of a perfect balance between the two worlds.

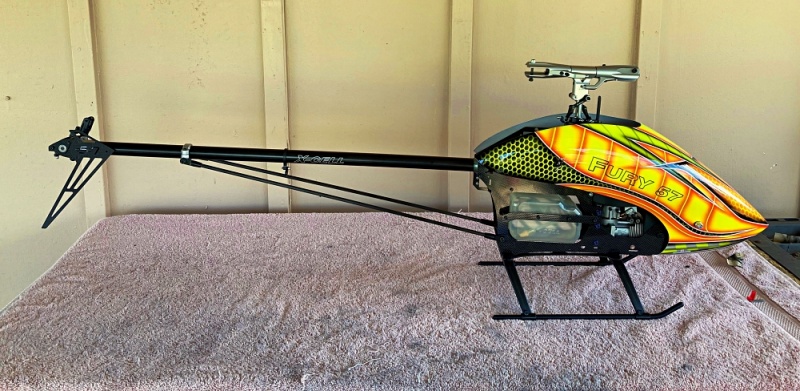
The next helicopter in my arsenal, is my Miniature Aircraft Fury 57. This little machine is a lot like the Fury 55 of years past, but better. Jut like the Whiplashes, it has plenty of electronic mounting options to fit any needs.

They added a gyro tray to the front of the helicopter, which eliminates the need for the upgrade tray that was available for the Fury 55 way back when. Plus there is a gyro tray on the rear of the frames as well, if you prefer the gyro on the back. I prefer mine to be on the front, under the canopy so the oil from the exhaust is blocked from getting on the gyro as much as it can with the gyro on the rear....Just my own preference.

The Fury 57 is belt drive, just like the Fury 55 was, and the tail rotor is on the left side of the tail box. I like that they added a bottom plate to the kit too, which comes with the kit now instead of being an upgrade.

They also slotted the mounting holes in the landing gear struts, to force the landing gear to break on the outsides of the frames when you crash. The slotted holes, along with the bottom plate will help save the frames in a crash.

I`m very happy to be flying Miniature Aircraft helicopters again, I hope to be with them for a long time.


Whiplash Nitro Update

05-13-2021

In my last two blog posts, I covered the building process of my new Miniature Aircraft Whiplash nitro helicopter. The build has been completed, and the helicopter has 20 or so flights on it at the time of this post.

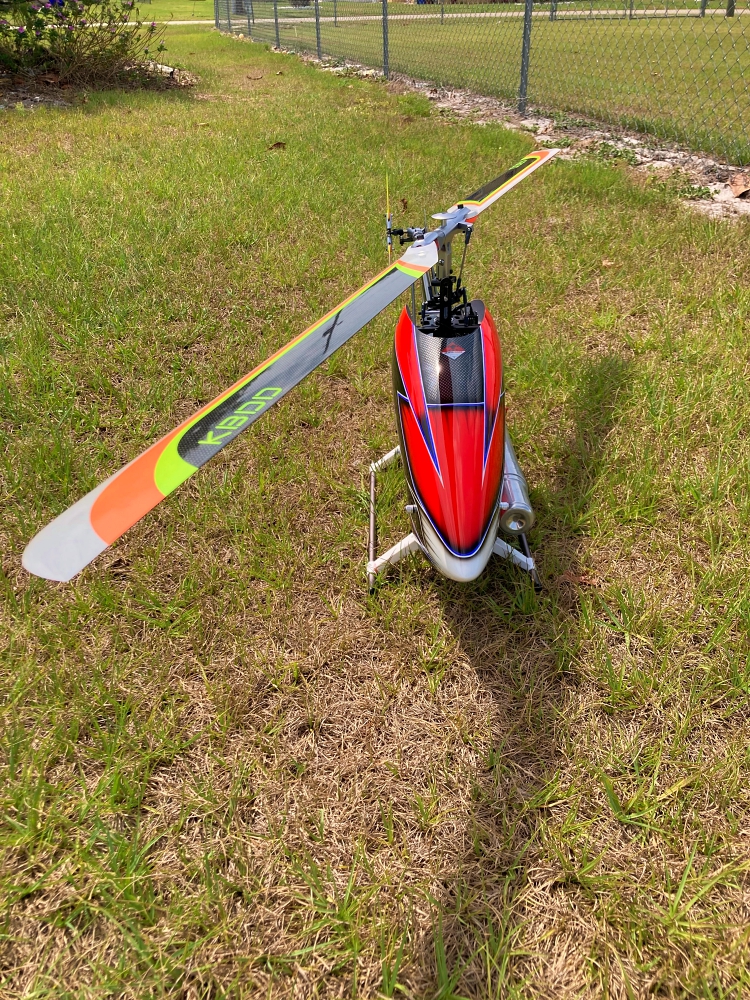
It took several flights to get used to it and start opening it up, but each flight gets better and better. It`s a very well designed and build helicopter, and it just screams quality. It is smooth, stable and predicable, which makes it even that much more fun to fly it.

The red canopy is a little hard for me to see in some orientations, but it`s nothing that I can`t get through.
Miniature aircraft will be sending me the neon orange canopies when they send me my Whiplash 730E and Fury 57, and I should be able to see them a lot easier.


Parts count on this helicopter is pretty low, which is a plus in the event of a crash. But from what I have seen from my team mates crashing them, they don`t break very easily.

The Whiplash is build to last, and even though they are build so tough, they are still reasonably light as well. Mine weighs in at 12.6 pounds with a full tank of fuel, and the tank holds a quart of fuel. I will try to get the empty weight, and include that in my next blog post.

It will take a wide range of main blade lengths from 690mm to 720mm. I have 710mm KBDD Extreme Edition main blades on mine, and it flies great.


I love the layout of this helicopter too. It has a ton of options for electronics placement and wire routing, which makes for a very clean appearance. That`s very important to me, because I do not like messy wiring on my helicopters. I will be posting updates here and flight videos on my youtube channel often, so stay tuned for those. my you tube channel link is; https://www.youtube.com/user/GeenaTucker
I want to give a huge shout out to all of my sponsors. Miniature Aircraft, KBDD International, Pulse Battery, Bavarian Demon, Kontronik Drives, Xpert RC USA. You guys ROCK, and I love each and every one of you.

Thank you all so much for visiting my website, and have a wonderful day. :)

Here is my setup:

Xpert KD1 cyclic servos

Xpert KD1T rudder servo

Xpert KD1E throttle servo

KBDD 710mm Extreme Edition main blades

KBDD 105mm CF tail blades

Bavarian Demon 3X FBL system

Pulse Ultra 5000 mAh receiver battery

Jeti REX7 receiver

Aerospire Multigov Pro governor

OS 105 HZ-R DRS engine

Botos ProTune 105 pipe

Switch Glow Pro onboard glow plug igniter


Whiplash Nitro V2....Part two

04-18-2021

I really love building helicopters. I build my own kits, and I build kits for other pilots as well. Installing all of the electronics is fun too. I just love it! But there is one part of building that is not as much fun for me, and that is the wiring.

I don`t dislike it because it is difficult, it isn`t. It`s actually quite easy. My reason for not enjoying wiring, is I over think it, and always end up redoing it several times before I`m satisfied with it.

Well..... that`s what I did today. Yep, took me all day to get the electronics installed and wired in. All the hard work has paid off though, and the helicopter is now ready to fly.

I started off by installing my cyclic servos. Xpert KD1s. There are lots of thing I love about Xpert servos. They have over current protection, over heat protection, and they are just really fast and strong. Plus the start up chimes and slow center up is pretty cool too.

My FBL sensor of choice is always and forever, Bavarian Demon. I have been flying Demon sine 2014, and they have always performed flawlessly for me. This helicopter got a 3X unit. I`ll likely change it later to an AXON, to take advantage of the upgraded sensors as well as the Jeti integration for tuning. My Blades are KBDD 690mm Extreme Edition mains, and KBDD 105mm CF tails.

My governor is an Aero-Spire MultiGov Pro. I absolutely love Aero-Spire. They are very reliable,easy to set up and tune, and they have always held consistent head speeds.


Next was fuel line plumbing. THIS I really enjoy doing, and I like to make the fuel lines as neat as possible. Nothing bothers me more than to have a nice clean build, just to ruin it with bad plumbing.

Now it`s time to put the first tank of fuel in....and it`s a BIG tank. I don`t know how much fuel it holds, but it put a big dent in a brand new bottle of 30%.

Final steps were to set the idle, and calibrate the governor. Now..... it`s show time. The maiden flight will be posted soon, (hopefully this weekend) on my youtube channel. https://www.youtube.com/user/GeenaTucker

Thanks again for visiting, and keep an eye on my channel for some cool flight videos. Also, I`ll be posting build threads on the Whiplash 730E and Fury 57 real soon. as well as flight videos for them. :)


Miniature Aircraft Whiplash Nitro V2 Build

04-18-2021

If you follow my site or my Face Book page, you know that I left Gaui and started a new chapter with Miniature Aircraft. Well... my first MA kit arrived a couple days ago, and I started building it this morning (April 17, 2021).

The build was very straight forward, but also very technical. Not a hard build, but definitely not a kit which can be just "slapped together". There are a lot of steps which must be done perfectly, to avoid issues later, such as getting the proper gear mesh between the crown gear and the torque tube gear. Sounds scary, I know. But follow the build manual to the letter, and it will all be fine.

The first step in the build was installing the link balls in the swash plate. There are two sets of holes in the swash plate for the two front servos, so you must pay attention to which ones the link balls will go into. The two rearward holes are the ones you want.


Moving on to step number two..... Head assembly! The first thing I noticed about the head components, was the head dampers. Instead of the usual rubber grommet style dampers, they used machined plastic (it feels like delrin) and O-rings. Pretty cool design and it makes for a solid feeling rotor system.

*Build tip* I found it very difficult to hold the damper sleeve to install the O-ring into the groove in the sleeve. I put the sleeve on the end of the spindle shaft, and I was able to control the sleeve and get the O-rings installed.


The rest of the head assembly was pretty must as it is with any kit, and it went together perfectly. One thing I want to mention, is that the spindle shaft has a nice slip fit into the damper sleeves and slides in with no effort.

Next we move on to the tail box. The tail box on this helicopter is the most impressive I have ever seen. It`s machined out of one piece of aluminum, and it`s just gorgeous.

The tail output shaft, gears, and bearings in the tail box and tail blade grips are all factory assembled. So that saves a few steps in the build. The slider, and tail rotor assembly is pretty basic stuff. The main thing to look out for is making double sure that the bog point socket screws in the tail hub, (0056) are seated properly into the dimples in the tail output shaft. Not doing so can cause serious issues later.

Moving on to the tail boom mount. The way the tail boom is mounted is very different from what I have seen in other brands. It`s amazingly simple, and maintenance friendly.

The tail boom mount is simple, but you still have to pay attention when assembling it. The carbon fiber plate (131-128), can easily be installed backward, which will result in misalignment and improper fit.

Once this step is done, it`s time to install the tail boom. The end of the boom with the hole closest to the end, slides in until the hole lines up with the screw hole in the center of the mounting clamp (128-80). Once lined up, an M3x6 socket screw is installed to pin the boom. Then the pinch bolts are tightened. Be sure not to over tighten the pinch bolts, to avoid damaging the tail boom.

The torque tube is one of the tricky parts of the build, and the manual MUST be followed to the letter here. Otherwise, the bearings can slip and come out of the torque tube sleeves. I assembled my torque tube the night before starting my build, so that the bearing retainer would have ample time to cure before inserting the torque tube into the boom.

*Build tip* When installing the screws into the ends of the torque tube, I like to install them in opposite directions from each other. Meaning... The socket heads of the screws are opposite sides of the torque tube from each other. In my opinion, this can keep tail vibrations down...due to an out of balance torque tube. This may or may not be the case, but it something that I personally like to do. :)

The frame assemble was a lot of fun for me. The quality, fit, and finish kept me smiling through the entire build. Before I got going on the frame assembly, I sanded the edges of all of the carbon fiber parts, as per the manual, so that there were no sharp edges anywhere that could damage my wiring. I did use an N95 particle respirator, a face shield, and nitrile gloves while doing this. Plus I was outside with the wind at my back. Safety first, right? ;)

Assembly of the frames as mentioned above, was a LOT of fun and I took my time and savored the moment. The bearing blocks are beautifully machined and finished. As are all other components of this kit.

The frames went together nicely, and I soon found myself ready to install the engine. My engine of choice is the OS 105 HZR DRS, with a Botos Pro tune pipe.

Something else I thing is worth a mention, is the was the fan shroud mounts. On the Whiplash, the shroud can be removed WITHOUT having to remove the engine. How cool is that? remove four screws and it comes right off. Speaking of the fan. WOW.... this thing is beautiful! The intricate machining, and that bright red anodizing is just incredible.

Once the engine was installed, I moved on to installing the landing gear, tail boom and tail struts. All that`s left now, is installing the electronics and getting it set up to fly. Which will be in part two of the build in the next day or so.

That`s it for now. I will get the electronics in and post the second part of the build as soon as I can. Thank you all for visiting my site, and have a wonderful day. :)

Time for a change

03-30-2021

It`s been six years ago, since I signed my first pilot contract with GAUI USA. The ride has been exceptional, and I met a lot of great people along the way. Not just friends, but family. I have truly enjoyed my time with GAUI, and their models are excellent. But all good things come to an end eventually, and the time has come for me to move on to new adventures.

That adventure begins with Miniature Aircraft. I was offered a position on their flight team a few days ago, and I graciously accepted. I will be representing Miniature Aircraft for the foreseeable future, and I am horned and excited to be a part of the Miniature Aircraft family and I can`t wait to get this journey started.

I`ll be ordering my helicopter kits soon, a Whiplash 730E, and a Whiplash 90 nitro. I`ll be posting build threads as soon as I receive the kits, so stay tuned for that. :)